Showing your Mail-in-a-Box users their email aliases
Only admins can see mail aliases. This will let your users see which they have available.
After reading a post on the Mail-in-a-Box forum about users and family members not knowing which email aliases they have available to them, it interested me enough to figure out a decent solution.
Roundcube is a core part of the Mail-in-a-Box set up, and in it, users have to manually add an identity in their settings before they can send from that email alias (an identity).
Only admins have access to the Mail-in-a-Box area where the aliases section resides (box.example.com/admin#aliases). Since non-admins can’t see anything there, they have no way of knowing which email aliases are available to them to add as identities.
In a Mail-in-a-Box installation, Postfix is used as the MTA, which handles submission authentication through Dovecot. In turn, SQLite is the database engine which was chosen to store information, like aliases, for these various aspects of the box.
This article will guide you through setting up an automated way of querying data from SQLite so that you can send your user their email aliases in CSV format. To store the CSV, we’ll utilize Nextcloud, which is another core feature of Mail-in-a-Box.
An automatic and manual method will be walked through in this guide.
Manually sending a list of Mail-in-a-Box email aliases to your user
1. SSH into your server and switch to the root account.
user@box:~$ sudo -s2. Dump the data from the database into a CSV file.
root@box:~# sqlite3 -header -csv /home/user-data/mail/users.sqlite "SELECT email FROM users WHERE email LIKE '[email protected]' UNION SELECT source FROM aliases WHERE destination LIKE '%[email protected]%';" > /home/user-data/owncloud/[email protected]/files/email-aliases.csvReplace [email protected] in all three places with the actual user’s mailbox address. This should be the account and not one of their aliases.
3. Change the permissions so that Nextcloud has access to it.
root@box:~# chown www-data:www-data /home/user-data/owncloud/[email protected]/files/email-aliases.csvAgain, change [email protected] to the user’s account. This is the root directory of their Nextcloud account. If you want to put it in a specific folder, add it after files/. For example, files/Auto-Generated/email-aliases.csv to place the CSV into a folder named Auto-Generated.
4. Scan the file so that Nextcloud knows it’s there.
root@box:~# cd /usr/local/lib/owncloud && sudo -u www-data php occ files:scan --path="[email protected]/files/email-aliases.csv"Change the --path to point to the user’s account. Nextcloud doesn’t automatically read files that are added outside of its web interface and WebDav, so this scan will let it know the file is there. Instead of using the --all flag, we only scan the actual file. Scanning the entire folder, or entire account, might take a lot of time depending on the amount of content in the user’s Nextcloud account. One file is quick and painless for your server.
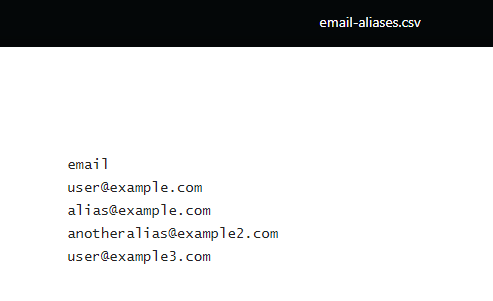
Now your user has access to a CSV list of their Mail-in-a-Box email aliases!
Automatically sending a list of Mail-in-a-Box email aliases to your user
This second method is similar to the first, only we’ll be using a simple bash script and cronjob to generate the email alias files.
1. Upload the script to your server. Placing it into the /root directory is easiest.
#!/bin/bash
sqlite3 -header -csv /home/user-data/mail/users.sqlite "SELECT email FROM users WHERE email LIKE '[email protected]' UNION SELECT source FROM aliases WHERE destination LIKE '%[email protected]%';" > /home/user-data/owncloud/[email protected]/files/email-aliases.csv
chown www-data:www-data /home/user-data/owncloud/[email protected]/files/email-aliases.csv
cd /usr/local/lib/owncloud && sudo -u www-data php occ files:scan --path="[email protected]/files/email-aliases.csv"
Replace [email protected] in all five places with the user’s account. Name the file anything you want; in this tutorial, we assume it’s named email-alias-query.sh.
2. Create a cronjob.
root@box:~# crontab -e
# Query database and send contents to user's Nextcloud documents
# Twice per day; 6:05 AM and 6:05 PM
5 6,18 * * * /bin/bash /root/email-alias-query.sh > /dev/null 2>&1
Paste the contents above into your root cron file. As the comments mention, it will fire twice per day — at 6:05 and 18:05. If you want to do it more often, change the schedule. An excellent site for generating cron expressions is Crontab.guru.
3. Optional: use this command to generate the email alias CSV file immediately.
root@box:~# /bin/bash email-alias-query.shSince the cron schedule only fires twice per day, you might want to use this command to generate the Mail-in-a-Box email alias file right away.
Whichever method you use, the Mail-in-a-Box email aliases will be accessible to your user, making it easier for them to know which identities they can use in Roundcube (or whatever IMAP program they decide to use). With the automatic option, the email-aliases.csv file will be updated periodically.
If you have multiple users, you can repeat the steps in a similar fashion, or use the bash file and copy the commands into the same file, changing the email account. That way, you don’t need to create multiple cron entries, keeping it all in one unified place.
Interesting read
Do you like to customize your box? If so, check out how to access your MiaB Nextcloud installation from a different subdomain.